Learn how to install an exterior or interior windowsill and assess how companies handle the process. You can determine honest estimates on window framing and how to optimize installation.
Are you shopping for new window sills? You may have run into a little bit of trouble when it comes to finding the proper window sills that are also within your price range. As a contractor or homeowner, you must also factor in renovation costs. That’s why knowing what installation involves can require will help decision-making.

Trusting A Windowsill Company
Does your old sill need replacement? Our reputable company has loads of experience and specialization in not only window sills but also window thresholds.
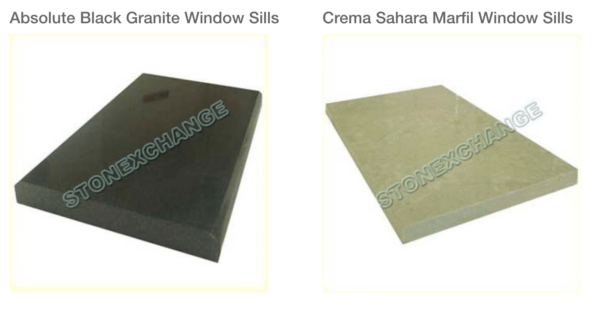
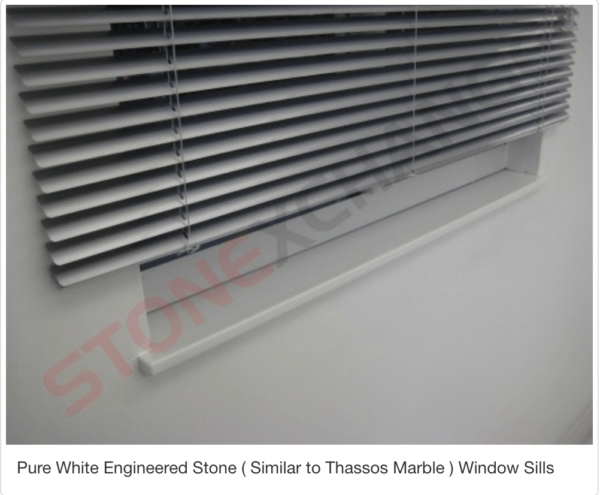
At Stonexchange, find the specific window sill you are looking for as a new addition to your home. We offer a wide variety of materials for our window sills, such as Travertine, Carrara, Cream Sahara Marfil, Black Granite, and any other finish you have in mind for your next home project.
Tip For Installing Your Window Sill
If you are purchasing window sills shortly, it is also a good idea to save costs by knowing how to install them on your own. Otherwise, you could have to pay a large amount of money to have a professional company come out and take care of the job for you.
Installing window sills can be easier than you think. It will give you the added satisfaction of touting your new skills. When showing off the finished project to onlookers and admirers, you can increase a home’s value. Don’t forget to follow these tips, for optimal renovation.
Measure Your Windows
Before you even purchase your window sill, you will need to take the time and make some measurements of your windows to figure out the correct size. Usually, a window sill hangs over each side of the window. Add one inch to either side of the length of the sill. With this rule of thumb, you can ensure that the stone’s cut is large enough.
Custom Cut Materials For the Window Sill
Once you know the sill measurements you need, you can often have these custom cut for you. If your window is a standard size, then you will likely not need to have this custom done. Most suppliers should have some already in stock to fit your window size.
However, before you purchase a sill, you will need to commit to the material of your choice. Decide whether you prefer rustic wood or something more complex and elegant, such as granite or marble.
Always consider practical factors before investing in your material. Stone, in general, is better for areas with high humidity or dampness. Why? Because wood warps when exposed to water for a long time. At the same time, wood has a beautifully polished surface and can match more interior design styles; granite and marble last longer while requiring less maintenance.
Find the Right Materials
Once you select your perfect material and fit, you will need additional supplies to complete your installation. Such equipment will include a strong adhesive glue, the window sill itself, a shelf (used to hold the sill), and possibly some finishing nails.
An important note: if the sill is not made of wood, don’t use a nail. Any hammering can cause integral damage to granite, marble, or engineered stone.
You will also need basic cleaning supplies to handle sawdust or residue. Keep a rag or towel and a spray cleaner that is safe to use on walls.
Steps To Install An Exterior Or Interior Window Sill
Once you have all the materials for a proper installation, follow these steps to optimize your process.
- Clean the area where the sill is to be installed with a standard cleaner. Spray the wall area down and wipe it up with a clean towel. This will prepare the wall for the strong adhesive you will apply later in the process.
- Using a level, set up the shelf to be installed. You must ensure that it is perfectly level so the window sill will not look crooked. Drill the necessary holes in the wall that will be used to hang the shelf.
- Next, you need to install the apron of the sill, which is the bottom portion that is usually decorative. This adherence is typically done with adhesive glue, which you can buy at your local home supply store. Apply the adhesive to the back of the sill and then push it into place. It is a good idea to read the instructions on the back of the adhesive to figure out how long it will need to dry. Determine whether or not you should apply any pressure to the sill or window frame.
- Once you have done this and let the adhesive dry, you will have successfully installed your window sill. You can repeat this process for any other sills.
The average amount of time each sill typically takes is about twenty minutes, though this can vary depending on your experience and how long it takes you to level the sill.
Enjoy Your New Window Trim from StoneXchange
Overall, learning how to install a window sill may seem like a daunting task at first. With that said, if you follow the steps above, you will find that it is not very difficult. Not to mention, your window sills will look great with any of our stones once it is all said and done.
Still, Have Questions on How To Install A Windowsill? Reach Out To The StoneXChange Experts
Put your custom touch on every window trim and sill by using premium quality materials available at Stonexchange. We are one of the most trusted windowsills, threshold, and soap shelf manufacturers and distributors.
Our experts at StoneXchange are ready to answer any questions you may have. Learn more about installing window sills or anything related to our process. As a manufacturer, we always give the best wholesale prices for your window needs. Don’t hesitate to contact us online to speak to a StoneXchange expert.


